Monday, August 20, 2012

Costume College - Friday


Friday was the first full day of Costume College, with lots of classes.  It took me a little longer to get dressed than I had allowed for - 18th century doesn't have many pieces, but it sure takes me a while - so I ended up going with Lauren M. to a class on the movie designs of Howard Greer. I confess I'd never heard of Howard Greer, but I discovered I was already familiar with some of his designs!

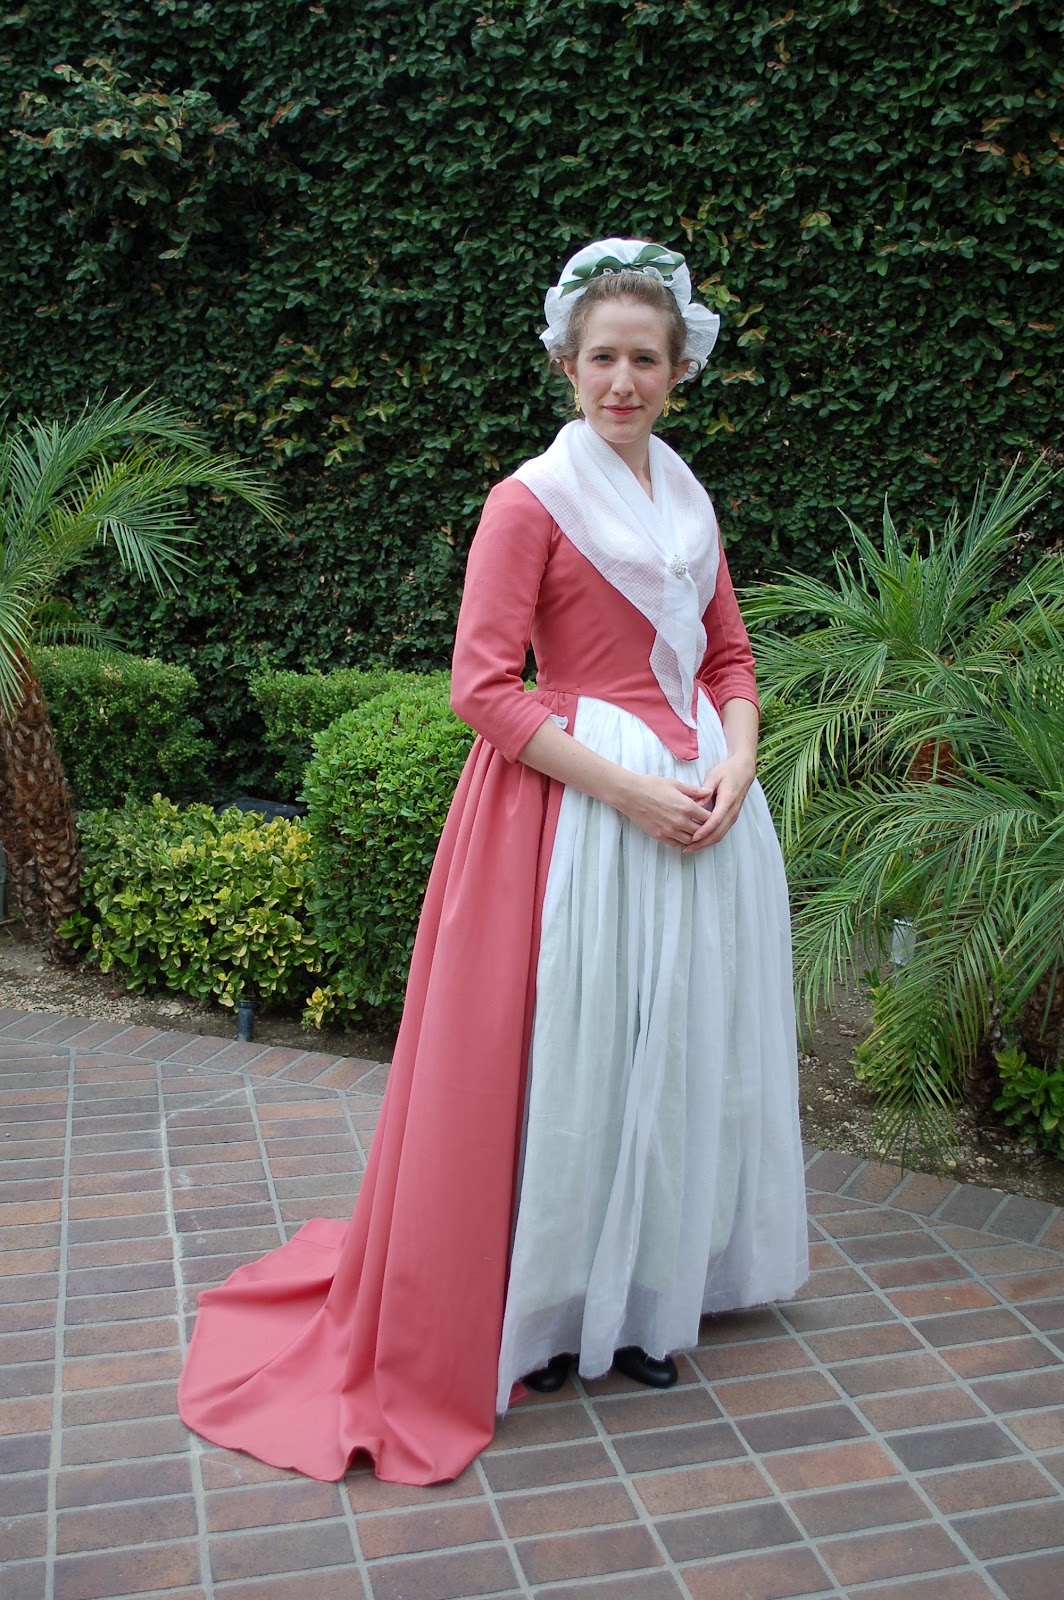
After that, Lauren and I headed outside to the one good picture-place at the hotel to get some pics of her Tissot dress, a fluffy white bustle trimmed with lots of pleated flounces and yellow taffeta bows, and my new 1780s pink wool gown.  More about it later, but I have to say I LOVE it. As gorgeous as taffeta is, my favorite thing to work with and wear is lightweight wool. <3

Photo by Lauren M.

Photo by Lauren M.

Photo by Lauren M.

Photo by Lauren M.


I love how it flows!

Then we had a brief lunch break in our rooms, and Stephanie and I headed to Kendra's (Demode) class on 18th century dress variations. What an awesome class!  Kendra covered 20 different types of garment, tracing several primary styles as they morphed through the decades and relating them to their "jacket versions" (So much better than considering them individual garments!), plus touching on some of the weird "new" things that appeared late in the century. I took pretty much constant notes. It was great!

There was a little more picture-taking in the hall, with this young lady in an amazing powder blue flannel suit. Does anyone know who the costumer is? She does beautiful work!


By that time it was dinner. Beth and I - still in my wool gown - made an In 'n' Out run for our little group. I sure made a sensation! And Beth ran into a couple of women who were still flying high after Camp Hollywood the previous weekend. To reverse how Beth explained Costume College for them, Camp Hollywood is like Costume College for swing dancers. ;)

For the ice cream social that evening, Lauren stayed bustled up, but in her amazing giant plaid.  The itty bitty hat is actually a 1930s forward-tilt hat - but it looks perfect.


Beth and Stephanie were both Edwardian pretties, Beth in nautical whites and Stephanie in Lady Mary's garden party dress. Darling!


Picture by Lauren M.


I wore my old-faithful handsewn white trained Regency again, but this time with black and gold accents as gussied up for the DFWCG's Mourning Party the previous weekend.  And unlike on that occasion, I didn't leave the dress and petticoat at home! So I had the full glory of turban, feathers, overbodice, and black and metallic vintage trim all around the skirt. And gold-colored jewelry from India - I love that stuff!

Picture by Lauren M.

Picture by Lauren M.
It was amazing to see what everyone else had done for the social. I really loved the Disney princesses.


And I got to see Megan's "chess piece" dress for the first time in person!


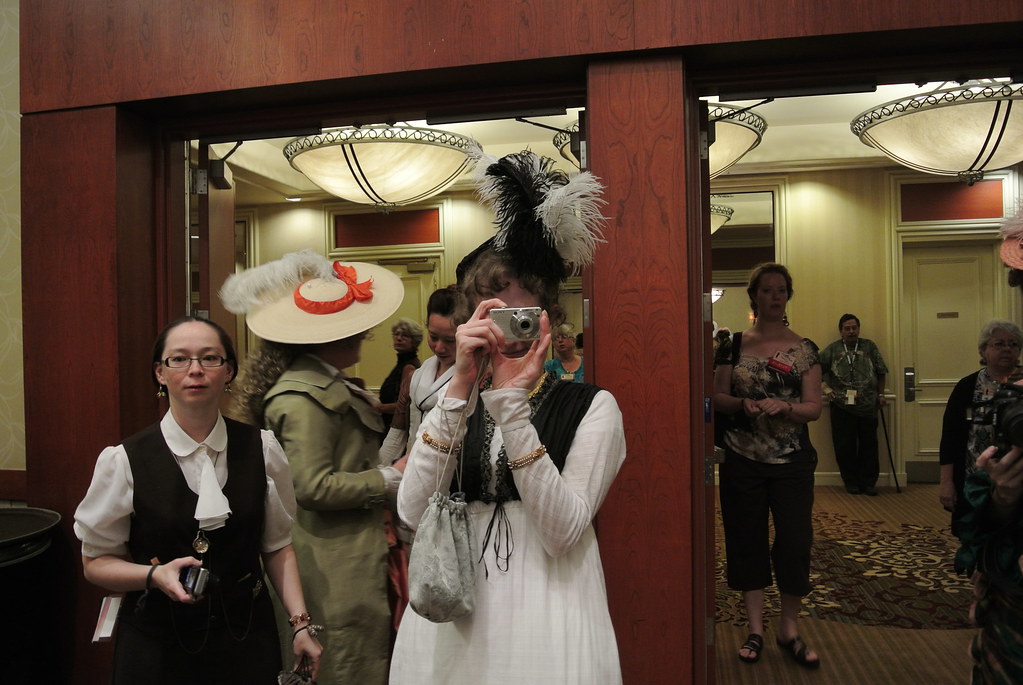
Not to mention photographing the photographers.


Picture from A Factured Fairytale

Thursday, August 16, 2012

Costume College - Wednesday and Thursday

 Backing up a little bit...

Wednesday was spent entirely on last minute sewing and trimming. Unlike last year, Lauren M. and I had determined NOT to do last-minute stressful sewing. So much for good intentions!  But we actually held to the spirit of our commitment, since neither one of us were stressed (unlike last year) and neither one of us had to sew at Costume College itself (again unlike last year).

So we talked and watched movies and compared opinions and dodged cats and watched our last-to-be-completed outfits take shape.

Mr. Charles approves of the Maid Marian dress.


The best movie for marathon sewing days.
Cat trap!


So Thursday morning we picked up Stephanie, The Girl with the Star-Spangled Heart, at the airport and headed straight to the garment district.  After several crazy hours, we left in good time to make it out of downtown Los Angeles and get to the hotel for registration. Apparently we arrived in the "sweet spot" between the beginning rush and the remaining bulk of attendees, since we had no wait in line and one of our rooms had a refrigerator. GREAT!  After taking all our stuff up, and Lauren M. checking her laptop with the A/V gear for compatibility, we found a grocery store and loaded up on breakfast and lunch items. Best way to save on time and money during Costume College. ;) Then we go dinner and headed back to the hotel for the Carmen Miranda pool party.

By the time we arrived apparently some people had left, and it was rather dark and not really at the pool - but it was still fun to see people.  Lauren (of Wearing History)  and Beth of V for Vintage took the theme and ran with it. Beth was amazing in full be-ruffled and be-fruited Carmen Miranda splendor - complete with banana'd turban! - and Lauren was amazing in white, fringe, and gold butterflies.  By contrast, Stephanie and I were country cousins in sports 40s halter bathing and play suits, respectively.

Beth. Photo by Lady Carolyn.
Lauren. Photo by Claudia La Rue.
Stephanie (right) and me (left). Photo by Val of Time Traveling in Costume.


I wish I had a better picture of my outfit, but I wasn't fully with it yet. :) The outfit started with the original 1940s chenille bathing cape. Lauren sent me an Etsy link probably 9 months ago and I couldn't resist. She's such an enabler!  It's hard to see, but there are red sailboats with blue sails all around the hem of the cape. It's darling.

For the rest of the outfit, I bought a white canvas/duck halter off Ebay, then found royal blue denim at Joann. I used an out of print Wearing History underthings pattern as a base for a bathing suit skirt, and added bands of blue denim to the halter.  I accessorized with a plastic bead necklace and earrings, a red (and totally invisible) crocheted snood, 1940s telephone cord purse, and Diet Pepsi. ;)

When we got tired we went back to our rooms, where we slowly got ready for bed and chatted way too late into the evening.

Tuesday, August 14, 2012

Costume College: Shopping!

One of the best of many good parts of going to Costume College (say I, with my lofty two years' experience) is the shopping. Both in the Marketplace at Costume College itself, and in the Los Angeles garment district either before or after. This year I spent most of my money in the garment district, but I did pretty well in other places, too.

I made it to the garment district on Thursday, right before Costume College. This was my third visit, and for the first time I really felt like I knew what I was doing.  I think for most people, their first time they just kind of freeze - sensory overload! Uncountable colors! Millions of yards of fabric! So much stuff everywhere, and no labels or prices to be seen!! But now I knew what to expect. Plus I'd had the benefit of using the fabric district in Dallas.  It's much smaller than L.A. (the district, not the city), but the stores are very similar with their overall lack of careful organization and labeling. This is not Joann's!

Anyway, on my first trip this year, I came away with:

A length of a mystery cotton blend print, for a dress, modern or vintage-inspired.

Light-mediumweight linen for 18th c. and Regency underthings.


A red/white changeable silk/silk blend (haven't tested it) taffeta. It's more an orange-red than a pink-red.
Pale peach/pink silk (silk/cotton?) for vintage undies. I wish I'd gotten more! Lauren M. was right...
Rhinestone brooch to use for 18th c. and Regency, inspired by some of the paste originals on my Pinterest board.


Then, at the Costume College Marketplace itself, I got a few more things.

A really big plastic comb I'll probably use for Edwardian when I get around to making that period. ;)


A vintage brooch that I think imitates paste jewelry pretty well. The big stone is a beautiful clear red.


A length of brocade coutil for a corset, probably Edwardian.
A new book by the author of The Dress of the People, about the fabric swatches from the Foundling Hospital. I bought this from Angela Burnley of Burnley & Trowbridge during her class on 18th c. textiles. So awesome!
Pink glass buttons, for what I have no idea. "Something Edwardian." ;)
Red plastic buttons with compass markings. I love them! Bought with no specific purpose, but now I have a very specific one. ;)
Heavy cotton edging, bobbin lace look.
Lighter weight cotton insertion, also like bobbin lace. One of these will be for finishing my Regency pantalettes.


Whew!  I was intending to leave the hotel on Sunday, but ended up staying another night. And then, naturally, we tagged along with the tour (and other people) right back to the garment district on Monday! I was fired up with a lot more ideas, not to mention motivated by things I'd seen on Thursday.

Mediumweight hymo from B. Black & Sons
Good quality shoulder pads, also from B. Black & Sons
100% white rayon, plainweave, for a 1940s blouse
100% blue (darker than the picture) rayon crepe, for another 1940s blouse
White linen blend (I think linen/cotton) for a 1940s shirtwaist dress, with the red compass buttons.
Purple and white changeable silk taffeta, just for the stash. ;)

Plus some fabric for a Secret Project for next year!

Lauren M. also gave me a couple of lengths of cream-colored cotton lace, some for my Edwardian stash and some for trimming my new vintage undies.

Not as fine, for vintage use.
A lighter/finer weight for Edwardian.

And then we stopped at a random antique mall. I did very good, coming away with only two things I'm still excited about:

Small purse-sized vintage flashlight, just like the big ones you see in movies, but only 5" long. It works!
Vintage necklace - black plastic leaves, clear plastic dangles, and brass dangles on a black cord. I love this style of necklace.

So there, that's what I came away with! I'm VERY glad that I was able to pack a flat, empty duffle in my luggage on the way out. ;)

Friday, August 10, 2012

Well, I'm back.

I didn't really have time to recover from Costumers' Lost Weekend before leaving for Costume College in Los Angeles. I had such an amazing time!  Now I'm finally home now and trying to process my pictures. I've got loads to post, and a lot of costumes to show. For now...


Sunday, July 29, 2012

Costuming the Civil War: Links

Welcome! Some of you may have been in my class on "Costuming the Civil War: Getting the 1860s Look" on Saturday the 28th, at the Dallas-Fort Worth Costumers Guild retreat. As promised, here is a list of my favorite 1860s-related links.  Some are informational and some are for shopping.  I'm sure I will add more in the future, too. Watch this space for updates. ;)


Information

Elizabeth Stewart Clark: The Compendium
Excellent articles and free patterns, in PDF format. I recommend:
  • Assembling Your "Best Bet" Wardrobe
  • Defining the Work Dress
  • Make a Basic Petticoat
  • Make a Simple Chemise
  • Make a Simple Slat Sunbonnet
  • How to Make Women's Split Drawers
The Graceful Lady: Originals
Anna Allen has collected images, mostly from ebay, of original garments, CDVs (photographic prints), and fashion plates, specifically for the early 1860s.

Bonny Blue: Historical Help
Geared toward beginning reenactors, this is an excellent introduction and how-to's for reproducing the 1860s.

Curiosity Shop: Glenna Jo & Bill Christen's Presentations and Works-in-Progress
Excellent presentations and articles from a very knowledgeable couple.

The Sewing Academy
A forum started by Elizabeth Stewart Clark, this is one of my favorite online places to hang out. The depth of knowledge here is matched only by the members' friendliness and willingness to help. I particularly enjoy contributions by Glenna Jo Christen and Carolann Schmitt, who began reenacting in the 1960s. If you have a question, go here and search the archives for an answer with evidence to back it up.


Shopping

Timely Tresses
 Bonnet patterns, kits, and buckram and braided hemp frames, from 1795-1865.  Their research into the early 1860s is particularly meticulous. The variety they offer isn't simply different styles, but shows how bonnet shape changed subtly but significantly from the late 1850s into 1865.

Mrs. Parker's Millinery and Mercantile
 Pam Robles (another member of the Sewing Academy) does gorgeous and incredibly accurate bonnets and hats, specializing the 1860s but spanning Regency and the full Victorian period. She also offers buckram bonnet forms as well as beautiful fancy woven straw bonnet forms. And she is the only source I know for accurate and varied straw hats.

Robert Land Historic Shoes
The only source for accurate side-lacing low-heeled 1860s boots. He also offers Regency varieties and newer-styled 1860s boots.

Bonny Blue Historical Clothing
Owned by Atlanta Shannon, who I know personally. She does beautiful work and takes custom orders.

Originals by Kay
Famed for their custom corsets. Also offer a variety of ready made items and cage crinoline kits, and also do custom orders.

Past Patterns
Patterns taken from originals but graded into multi-sized garments. This line has a good reputation and I have had success with those I have used. They include extensive historical notes.

Laughing Moon Mercantile
Offer a beautiful day dress pattern. I have not personally used it yet, but Anna Allen of the Graceful Lady was  very impressed.  [ETA 3/11/13: I've now fitted it to me, and I love the look it gives; I can't wait to make my first dress with it.] Their basic Victorian corset is slightly long in the hip, but otherwise perfect for the 1860s, and has very high reviews.

Fig Leaf Patterns / Dancing Leaf Designs
Patterns developed with Kay Gnagey of Originals by Kay, such as a wrapper pattern and a paletot (coat).

Truly Victorian
Also have a very good reputation. Specialize in post-Civil War patterns, but offer quite a variety of 1860s skirts and bodices. Remember that 1860s skirts are mostly squares, and be careful that the bodice option you choose is appropriate for your use, time period, and fabric. The 1858 round cage crinoline is too big for most uses. IMHO it also looks too round, but I have not seen the pattern myself.


More to come!

Also, feel free to leave any questions in the comments, or email me. Thank you for visiting!


Wednesday, July 18, 2012

Sewing Room, with Bonus Table Tutorial

Yes, I have a whole room for sewing and storing costumes! (And the computer and mailing supplies and vintage to be resold &c...)

Last year I bought a house. Until that time I lived with my parents. All of my sewing supplies and equipment were stored in my little bedroom. I had two under-bed boxes of fabric, three stacking bins in the closet, one medium dresser drawer of tools and supplies, multiple boxes of patterns and trims in the closet, and the knee-hole under my desk was usually full of sewing boxes, current projects, and things that couldn't possibly fit anywhere else. I had another bag of fabric in the attic, along with some wool batting. My sewing machine lived on a shelf in the closet.

In order to sew, I set up a decades-old card table in the middle of my floor, next to my bed. I sat on my vanity stool to use the machine. The ironing board was on the other side of the table. I couldn't get the under-bed boxes out with the table set up. Cutting out involved a cardboard cutting mat on the floor (again, no table) or occasionally on my bed. Did you know a cardboard cutting mat is the exact size of a twin mattress? You'll thank me later.

Going from one small bedroom to an entire house is of course fantastic. Part of what made my house The One, though, was its bonus room: A loft under the peak of the roof. It is not open to the rest of the house, but the stairs enter directly with no door. It has no bathroom, but a huge closet. And one big window (directly opposite the neighbors' house, the only drawback). Perfect sewing room!

I spent a lot of time looking for sewing room inspiration. With no furniture to speak of, I had a very blank slate to start with. Here's what I had before New Year's.


The white farm table was $85 at an antique mall, and it just about killed me to get it upstairs. The legs screwed off easily, but the table top itself is incredibly heavy. It must be solid oak. I had to roll it on its corners from the vehicle to the front door, slide it across the carpet, and tug it with frantic strength up the stairs. It's wonderful, though. The white paint is heavy and smooth, with enough existing nicks that I don't feel bad for using it. It's heavy enough that it doesn't shake or move when I shove it or the machine gets going fast.


The lamp is an old "ginger jar" (my name!) from my parents' attic. I've since gotten another one, but this one is still in use on the computer table.

I also love the small bin organizer (from Target), which holds tools and some notions.  One has scissors, one has pins and pincushions and tape measures, one has drafting tools like pattern weights and chalk, one has fasteners like hooks & eyes and snaps...

The thread spool holder will eventually go on the wall. I didn't want to make a bunch of holes yet, though, because I'm still settling in and things can move. As it happened, the table has since moved, so this was a wise choice.

The yellow chair is one of a pair of original Victorian Eastlake chairs I got for a bargain at $75 for the set. Since then, the webbing on the bottom has torn. I still need to replace it. Oops!

I love my mother's wooden ironing board, and hated using the flimsy metal ones owned by college students and hotels. This one could be longer and taller, but I found it, complete with cover, for $15 at another antique mall.
 
 The trunk barely visible on the right I bought at an antique mall (See a trend here?) 4 or 5 years ago. It holds nearly all of my Civil War reenacting gear. Dresses, outerwear, and petticoats hang up elsewhere, and my undies (chemises, drawers, and corsets) are in a smaller chest to be handy for fitting. In my old bedroom, this trunk also held up my computer. I sat on the end of my bed, keyboard on my knees, mouse on the windowsill, and my feet on the small chest. It worked, but I don't miss those days!


And here is my darling, my cutting table. I'm fairly tall at 5'9".  My old sewing layout had lots of disadvantages, but I never knew the misery of cutting on a regular table until I moved into my house. Oh, my back and shoulders! I'd rather cut on the floor for the rest of my days!  This table is counter height, roughly waist high on me.  It's simply a door, covered with oilcloth, and resting on two large-size bin organizers, also from Target like the small one. The organizers are 36" tall exactly, so with the depth of the door, the surface is over 37" from the ground.

The door is slightly too narrow and too long to fit the cardboard mat exactly, but it's very close. After 6 months of constant use, I'm still thrilled to have it. I use it constantly, not just for cutting. All of my pattern draping and tracing, layout, pinning, taking notes, and even ironing - it's my preferred workstation.

Ironing? I don't mind ironing, but huge lengths of fabric can be a real pain. My new board is smaller than the one I'm used to, too. In desperation, I pulled out a wool blanket, which is thick and insulating, and clamped it to the table top with $1 heavy spring clamps from Home Depot. Worked like a charm! I could iron the entire 60" width at once, and as long as my arms could reach. It took 1.5 hours to iron 15 yards, instead of 2 or 3 times as long. Yay!

The cubbies are another idea I'm so glad for. The pink and green fabric bins hold a variety of things, from trims, flowers, lace, and tape, to patterns organized by type and size. One holds all my muslin, from the nice recently-bought lengths to the crazy shapes that are impossible to use but too big to throw away. One cubby holds ironing supplies: spray starch, distilled water, and spray bottle with water. (Way better than just a steam iron!) I've saved the zippered bags that come with bed linens and curtains, and use them for storing on-hold projects, especially those with lots of pieces or notes. And another cubby is the perfect size for a 3-drawer organizer. One drawer holds neat folds of interfacing; another holds all my zippers. I didn't realize I had so many!

The cedar chest was given to me by my grandmother over Thanksgiving. It holds almost all of my fabric, including all of my wool.  The rest is in the bins on the left.

There's plenty more stuff piled out of sight behind the table. This is very much a work in progress. I will post some more recent pictures soon, showing it in all its Costume College-related chaos.


Bonus Table Tutorial

I'm not sure anyone will find this beneficial, but I might as well write up exactly how I made the table.

The top of the table is a door. I got a hollow-core unfinished wooden door in the standard bedroom door size, 80" x 36".  It comes ready sanded and ready to prime, with no door handle hole cut.  Home Depot, under $30.

To cover it, I bought 2.5 yards of oilcloth (flannel-backed vinyl) from Joann.  I think the cover is somewhat optional; the door had no snags or sharp corners that I could find. I wanted something with a smooth surface and no dyes to rub off.

Then center the door on the oilcloth and get to work with a staple gun!


I folded and stapled each corner in several steps to get it reasonably smooth.


Don't pull it too tight. You don't want it loose enough to wrinkle or pull, but oilcloth isn't meant to be under a strain.


Then put it on top of your organizers, or matching low bookcases, or packing crates, or sawhorses, or whatever works for you.  Done!

I was planning on having the table top fastened to the top of the shelving units, but my father talked me out of it.  The door and the organizers are plenty sturdy; I've not yet had it rock or tilt. I've shoved the top over slightly when leaning on it, but that's all. And having them bolted together would make it extremely difficult to move or adjust. Sometimes I want it a little closer or further from the wall, and moving the organizers is a lot harder than just sliding the table a few inches.  I did move the whole sewing room around a few months ago as well. I was very glad then they weren't in one piece!


Whatever your current sewing setup, whether it's an entire room or a desk in the corner of your bedroom (or a card table in the middle of the floor), what is your favorite part of it? In my old one, I liked how I could get on either side of the ironing board.  Now, it's my tall table. What's yours?