Friday, March 22, 2013

Historical Sew Fortnightly #6: Stripes: Fringed Reticule


I desperately needed a reticule to go with the red wool dress from the Embellish challenge. I had some fabric left, and a good length of self-made fringe. So I was off!

DSC06466

I've been planning to make some reticules for a while, collecting images on a Pinterest board. So when it was time to make this bag, researching was fast! The majority of surviving bags tend to be silk, in light colors, and embroidered or painted. Neither one of those options was going to work for this bag. There were a few dark colored ones I found, mostly in velvet; and one of those did not have any trim at all, although it had some big tassels.


I also quickly decided I wanted a bag that was 3-D, instead of flat or gathered all around. I was particularly drawn to bags with angles and straight edges instead of curves.


This was my favorite. It's been folded very flat, but it does appear to be three-sided instead of two. (Hurrah for multiple pictures at the Met!)  If it is three sides, it should be assembled just like the purple silk bag.  There are only three pieces, each a tall hexagon. The long sides are sewn to each other, then the bottom points are sewn together to make a bag.  The top points on the velvet bag are left free to stick up, because the drawstring channel is run across from corner to corner.


I made my best guess on the proportions from dimensions at the Met and MFA for similar bags. I deliberately erred on the "too wide" side because I want this bag to be functional.  Tiny, ornate little jugs or pineapples are adorable, but I really needed a bag I could carry keys, a phone, and a camera in.  Besides, when I do make a tiny reticule, I want it to be something awesome and beaded or netted or embroidered within an inch of its life!


To fit the Stripes challenge, I thought it would be fun to do the same thing with fringe on the bag that I did on the skirt.  I had exactly enough fringe to go twice around the bag.  I cut the bag pieces long enough to do the inverse tuck I did for setting the upper row on my skirt.  This time I took better pictures. It's a much smaller project, so it's easier to document what I did. Although the red turned out very reflective with the flash, so maybe these won't be helpful at all.

To start, I sewed the pieces together into a strip. This would be incredibly difficult to do in the round.
DSC06446
Pressing lines for the two tucks.

DSC06448
It's hard to see, but this is with the first fold pressed. Wrong sides are together, with the shorter side on top.

DSC06450
Pressing the second fold of the tuck, on the wrong side. It's about 5/8" deep; tricky to get precise with this wool.

DSC06451
One tuck done.

DSC06452
Detail view, from the right side.

DSC06453
Both tucks done, ready to insert the fringe.

DSC06454
First row of fringe sewn in, and the second row half sewn and half pinned. This was easy to do from the right side.

DSC06455
Reverse side, showing the tucks pointing upward.

Then I prepped the lining.  Since I wanted standing points, those had to be faced; but I wasn't excited about having more wool on the inside of the bag. So I cut facings for just the points, and sewed them to a linen lining.

DSC06456

DSC06457
All visible sewing is by hand.

I also did two eyelets on the inside, for the drawstring casing.

Figuring out how to assemble this was tricky. My goal was to be able to sew everything together, turn it, and have one inside lining seam to do from the outside. I thought it all through several times, then pin basted the entire thing just to make sure. Then I took notes so I wouldn't forget how I did it. The drawstring casing was done last, by hand, when it was entirely assembled.

DSC06458 edited

DSC06459

DSC06460

DSC06464

DSC06469

Someday I will replace the ribbon ties with silk cord, and probably tassels as well. Lots of tassels!


The Challenge:  HSF #6, Stripes

Fabric:  Dark red wool tricotine from FFC

Pattern:  Self-drafted from museum pictures and dimensions.

Year:  1800-1820, roughly.

Notions:  1/8" black silk ribbon for the drawstrings. Self-fabric fringe.

How historically accurate is it?  Oh... 60%? I can't exactly document the fabric or fringe on a reticule, but I have a very small number of examples to make generalizations from.  I did machine sew pretty much all construction seams. This bag had to happen in one day or it wouldn't have happened at all. I wish I'd had the time to do it by hand! But the shape and construction is accurate.

Hours to complete:  About 7; I did it last Friday. I got started in the early afternoon and finished in the middle of the evening.

First worn:  This coming Saturday.

Total cost:  None, because this was a bonus project by my standards. The fringe was left over, as was the wool. The ribbon is just stock on hand.


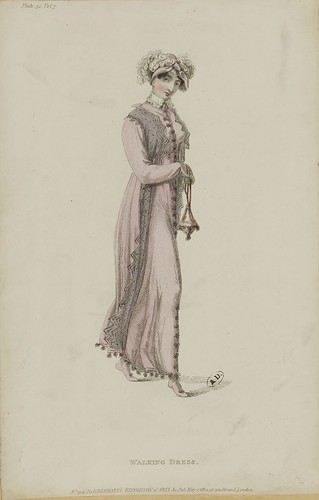
I did  wonder briefly if perhaps matching the reticule to the dress is a no-no, as it is in other decades.  As far as white cotton or silk goes, I think it's fine; extant dresses and reticules in white are plentiful.  As for colored reticules, a quick survey of fashion plates showed three categories: Reticule matching part of the evening dress, reticule matching spencer or other wrap (and often other accessories), and reticule matching a "walking dress." 

M5053MA_214X02X00034_L_3

My red gown isn't a walking dress, so this isn't the best documentation.   But it's hard to prove or disprove a negative, so I'll just keep an eye out for different examples.  For what it's worth, the many fashion plates of wool gowns don't show any reticules.  And there are always more reticules in my plans.

Thursday, March 21, 2013

We were like children posing... Poses, First Edition: Regency

I'm a bit of a diva. I'm an introvert, but if I know what I'm doing (like singing a song, performing a dance, or flying a kite in full 1780s ensemble), I admit I like attention!  And usually, posing for pictures when I'm all dolled up in a vintage or historical outfit is the same.  But sometimes, I get an an attack of "I don't know what I'm doing!"  Suddenly I have no idea how to stand, what to do with my hands, how to position my feet, or do anything else with my body. So I just default to nothing at all.

DSC06751
Photo by Festive Attyre, who was certainly not to blame for the lack of a pose.

I've thought about researching how to pose; Stephanie shared some terrific posing basics recently.  But those are general techniques.  What poses did they do back then? And which "then" are we talking about?  Take Betty Grable's iconic pinup.

Source
That would look really strange in an 1860s hoop skirt!  Each period has its own style and its own points of beauty to emphasize.


So mostly for my own education and entertainment, I'm going to make an informal survey of original pictures from different periods to figure out a handful of basic poses for each.  Particularly I'm going to focus on full-length, standing-still views that don't rely on large props like furniture, or seated poses without tables or other things. Usually when I take costume pictures I'm without any props except for what I carry, such as in the halls at Costume College.  My best opportunities tend to be a tree or two when I'm outside.

First up, I'm starting with the Regency period.  The Picnic with the Pixies is Saturday, and I want to be prepared!

* The title line is from the song "Charade," from the 1963 movie of the same name. Music by Henry Mancini, lyrics by Johnny Mercer.


The Classical Ideal: Posing in the Regency Style


Free Standing

I prefer portraits, because they don't tend to suffer from bad drawing or out of proportion figures like fashion plates do. However, full-length free-standing portraits are rare. Anne has the benefit of a romantic seaside backdrop, and a shawl that is both rippling in the wind and velcro'd to her left elbow.  But the right hand placement is graceful, and her hidden left hand could be holding a reticule or parasol. Her whole body, and her head, are angled slightly away from the viewer. One foot is foward.

Joseph Clover, Anne, Lady Beechey


From a fashion plate, but this is just a single example of a very simple and common pose. Face and body straight or barely angled to the viewer with one arm down by her side holding something (anything - just make sure it's something) and the other bent at an acute angle, with the hand just across the centerline of the body. White space is achieved between both arms and the waist. Feet are in fourth ballet position, with the front foot pointed.
This can be done with an accessory, like a reticule, in the upper hand, or it can be empty. The hand can also be held higher, lower, or lower still. Just keep the elbow bent and the wrist curved downward. If the hands are any lower, they're usually together.

1814, Costume Parisien. Dress of wool.


This is very elegant, whether you have an accessory or not. Arms crossed, slightly clasping the wrists. Plenty of white space around the waistline. Body facing the viewer, face and gaze tilted away and slightly down. Feet in fourth ballet position.
Here's a variation with the hands lower down, but elbows still strongly angled.

M5053MA_214X03X00039_L_3
1815

I like this variation - the pensive look! It's rather sweet. One hand holding the other elbow, fingers on the side of the face. Facing the viewer, head tilted toward the hand. Feet in a loose third, pointed.

M5053MA_MODX08X00084_L_4
1810, Costume Parisien. Velvet hat, trimmed with plush-marten. Velvet jacket.


Here, angle the body slightly away, and turn the head slightly back to the viewer.  The active hand is shading the eyes or touching up the curls, and the feet are in third ballet position with the angled foot directly toward the viewer. Here is another plate where the figure is touching her headdress. It may feel awkward (or silly!) to us, but it's a period pose.

1816, Costume Parisien. Satin spencer, dress of crepe.


The lady in a tam is in a surprisingly modern pose. Is her hand really on her hip? She looks very jaunty, and with her hand hidden by her plaid, she's not emphasizing an unfashionable waistline. Body angled away from the viewer, head turned slightly toward, one hand on a chair back (or a wall, or a table, or a fence, &c.), left foot forward with supporting leg bent. I'm not sure that last part is physically sustainable. Just don't stand straight with your feet together!

March 1814. Opera Dress. La Belle Assemblée.


This is somewhat unusual, but it's so striking I'm including it. The subject is an older lady, wearing an old-fashioned cap with a fashionable dress.  The pose is completely side-on, arms gracefully bent and hands holding a posey in front of her. Note also that she is in motion, or posed that way, with one foot in front of the other.

Woman in a Blue dress, Jacob Maentel, ca. 1810; Winterthur 1957.1121 A


Free Standing, Back View


This is excellent for showing off the back of the dress. Whole body is slightly angled, upper body slightly more away, and head approaching profile-view. Arms are slightly bent and slightly to the front, preserving white space between the body. The foot closest to the viewer is peeking out from under the dress. Get in this pose as if standing at an angle, then take the left foot and step away into fourth ballet position, shifting weight forward and keeping the toe of the right on the ground. That should drape the skirt nicely.

1811, Costume Parisien. Hat of satin and crepe; dress of merino wool.


Here is an unusual back view portrait, unfortunately not full length. The girl's body is angled not completely back to the viewer. Her upper body is slightly twisted toward the front, while her head is straight over her right shoulder and her eyes meet the viewer's. Her back arm is down and slightly bent, while her active arm is angled so her elbow is above her waist. Her fingers and thumb make an "O," with fingers together, just touching her cheek. Again, white space is preserved around her waist, even with the draping of the shawl.

Ekaterina Vasilevna Saltykova, c. 1800


Leaning


Okay, I said I didn't want poses that relied on a prop. But Felicte's pose is a favorite in portraits and fashion plates alike, and very Classically-inspired.  She is leaning slightly to the left, probably with her hip supported by the fence or gate. The fence is just high enough to support her left elbow at a slight angle away from her body. Her arm and hand come forward and across her body.  Her left leg crosses her right casually, feet fairly close together and toes angled slightly toward each other. As with Lady Beechy, her non-active arm and hand hangs at her side, in this case holding both a bouquet and her shawl. Her head is tilted back slightly to the right, opposite from how she's leaning.

Felicite de Durfort von Merry-Joseph Blondel, 1808


This pose can be replicated against a vertical surface like a fence, tree, boulder, interior wall, or even a doorframe. The figure's feet are at least a foot away from the support, forcing her to lean back into it. The surface and her body are both angled significantly away to the viewer's left. Her arms are slightly bent, hands holding a book; a fan could be used similarly.  As with Felicite, her left foot is crossed over the right, this time barely resting on the ground, almost in fifth ballet position. Her face is angled (too much - bad drawing) back to the viewer's right; either like this, or straight at the camera, would be effective.

1803, Costume Parisien. Hat of Organdie, Piquéé.


Seated


Part of the Regency aesthetic seems to have been the graceful, relaxed curve of classic art. This is directly in opposition to the super-straight-backed look of the 18th century; however, it is definitely not a modern comfortable slouch.

* This lady is seated in a "modern" (Regency) chair with a slightly tilted back. She is seated all the way back in it, gracefully reclining her upper body. So she isn't sitting ramrod straight, but her belly (if she had one!) isn't sagging. Also her shoulders are still down, not rounded or slumped forward in a modern slouch. (Even in this portrait, the shoulders do not round forward.) Her head is tilted slightly forward.
* Her hands and forearms are slightly crossed, not quite to her elbows; they're not tucked into each other in the modern style. This keeps that all-important "white space" around her waist. Also, her arms are positioned below her high waistline, but not resting on her belly or her lap.
* Her legs are extended forward, slightly bent at the knee, and crossed just at the ankle. Again, the foot toward the viewer is crossed over. One foot is flat on the ground, the other pointed. This can be a very comfortable pose.
1818


Here's a different seated pose, good for backless seats.
* Kitty is seated at an angle to the viewer, but leaning slightly forward and twisting toward the viewer, looking back to her left. Her long necklace or necklace can drape naturally. Her arms are resting in her lap, one with plenty of white space from the gown.  The other covers her side, but her bare arm does not visually merge into her gown.
 * Her legs and feet in particular are the key here. The back knee is bent at right angles. The front leg is extended more like in the previous portrait, with her foot showing. This is another comfortable Regency pose that is easy to hold. Note that her knees are apart, although it's not emphasized as in some fashion plates. Try to avoid a knees-together pose for Regency; most of the time it looks stiff and prim, opposite of the graceful, relaxed look desirable for the period.
Portrait of Kitty Packe, by Sir Henry William Beechey (1753-1839)


A seated pose in a short, nearly straight-back chair. It is nearly straight - her upper body does angle slightly back.
* The back arm is over the back of the chair, angling her body slightly; she holds a fan, but a posey or a handkerchief or a card would work as well. Note the white space between her arm and her waist. Her other arm covers her waist, but like Kitty's, it is bare and doesn't blend. It is slightly bent, with her wrist bent more and holding a handkerchief.
* Her legs are crossed at the knee! Again, very modern to us, but very common in period illustrations. The near leg is the one that's on top.
September 1813, Evening Dress. La Bell Assemblée.


Here, the Princess is seated, with lower back and tummy straight. I'd have to practice getting that graceful upper body forward curve without actually slouching or rolling my shoulders in! Her arms are together in her lap, palms upward, fingers relaxed. Her feet aren't visible, but her legs aren't crossed; her ankles might be.

Princess V. S. Dolgorukaya, Henri Francois Riesener


One more seated picture. Again, legs crossed at the knee; also the hands are together in the lap, this time palms down, hand on wrist. She is sitting like the Princess, but with her head forward and tilted to the side.

September 1814, "Sea Side Morning Dress and Bathing Preserver [?]," La Bell Assemblée.


General Guidelines

If you can't remember any one particular pose, but someone points a camera at you, what do you do?

* Angle your body away from the camera.
* Turn your head back toward the camera.
* One hand up and one hand down, or clasp them together.
* Hands and fingers curved, palms downward.
* If standing, feet in third, fourth, or fifth position.
* If sitting, cross your ankles or your knees, with camera-side foot on top.
* White space around the waist!


One thing I left out of this analysis was trained gowns. There are a surprising number of illustrations of gowns with trains, and how Regency-period women draped them, carried them, and even pinned them. Sometimes they look strange to us, particularly in fashion plates drawn with less skill; but there's some interesting, helpful things there. At least to anyone who wears a trained Regency gown. Would anyone be interested in such an analysis?

Wednesday, March 13, 2013

Historical Sew Fortnightly #5: Peasants & Pioneers: 1860 Chemise Trimmed with Wavy Braid


DSC06417

This chemise began as a UFO from December. My whole family has been Civil War reenactors since the mid-1990s, so I made one of my new sisters-in-law some underthings to jump-start her wardrobe. Her birthday and Christmas are two days apart, so it worked out well to give a set. I passed on a corset that no longer fit me (newly washed, dyed, and flossed), and made a chemise and petticoat. Both garments were simple, and unadorned except for the "wavy braid."

Wavy braid was the mid-19th-century term for what we call rickrack.  It was used on some children's clothing, as well as on adult underthings and "linens" (collars, cuffs, and undersleeves).  Unlike dresses and outerwear, underthings were subjected to relatively frequent and tough laundering, involving bleach and boiling. Hence underthings tended to be fairly plain, or trimmed with sturdy things like self-fabric tucks and broderie anglaise.  Wavy braid is also an option.  It could be worked into lace-like designs, used as an insertion, or used as a pointed edging. (Read more about wavy braid here and other places on The Sewing Academy.)

DSC06428
One tiny shoulder seam, with felled seams and trim.

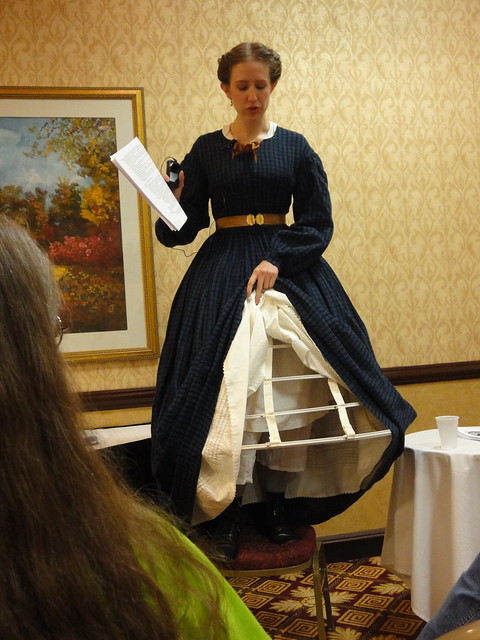
Some time ago, I commissioned an 1860s petticoat from Sarah Engelke, aka MsMcknittington.  She did an AMAZING job! Something like 20 tucks (I hate tucks, mostly because I'm lousy at them) in two sizes, hand gathered, and edged with wavy braid. I wore it at the DFWCG Costumers' Lost Weekend last summer, where I ended up showing it off when trying to explain my cage crinoline. ;) It's a lovely petticoat, and I definitely want more undies that match.

DSC00296

I still had a lot of wavy braid left.  I couldn't spend too much time on the undies for my sister-in-law, but the wavy braid with a fast, accurate, and cute way to trim them.  I fell for my own design, and went ahead and cut out a duplicate chemise for myself.  I had visions of working them in assembly line, but got in a crunch and didn't far past the cutting on mine.

After Christmas, the Historical Sew Fortnightly occurred, and I was swept into more urgent projects. I was at semi loose ends for Challenge #5, but the forlorn pile of pieces was calling and I can really use it at Gettysburg.

DSC06416
I am a perennial one-shoulder-chemise-wearer. I have no idea why.

This chemise is a simple design with no separate sleeve. It's more typical of post-1865 years, but the pattern was taken from an original with an 1850s date.  It is a simple flared shape with no gores or gussets. The yoke is a straight band with no shaping. The placket is a strap with a curved end, set in a slash in the front of the chemise.

DSC06424
I have no idea why my stitching ended up so crazy. At least it's secure!
 
 The seams are flat-felled to the outside to minimize any rubbing against the skin, and the wavy braid is applied as a point edging, sandwiched in the yoke, the plackets, and sleeve facings.

DSC06427

The fullness is controlled with stroked gathers. Stroked gathers are run by hand as in regular hand gathering, but when the threads are pulled up, each tiny gather/pleat is sewn individually to the band.

DSC06426
Why put a placket in a chemise? When wearing a low-necked gown, I can undo a few buttons and have a bigger neckline. Huzzah, no chemise peek!


The Challenge:  HSF #5, Peasants and Pioneers

Fabric:  Pimatex brand pima cotton; I get mine from Dharma Trading. Recommended here, among other places. It closely resembles the material used for many mid-century chemises, drawers, and petticoats. It is tightly-woven with a crisp hand, even after being washed, and takes liquid starch extremely well.

Pattern:  1850s chemise pattern diagram, from Hunnisett's Period Costume for Stage and Screen, taken from an original.

Year:  I will be wearing it in 1861-1865 settings, but it's appropriate for any time after the initial date for a decade or two. Chemise designs do not change quickly.

Notions:  100% cotton wavy braid (rickrack). White china buttons with a shiny finish.

How historically accurate is it?  Nearly 100%. All period and appropriate materials and techniques. Sewing machines were widely used in the period, particularly for visible sewing, and I adjusted the stitch length to be much shorter than modern usage.

Hours to complete:  12-15 hours. Construction was easy, and even the stroked gathers did not take long. (Of course, I also made them pretty big.) And I had already puzzled over doing the placket on my sister-in-law's chemise, so that problem was already solved.

First worn:  Just for the pictures. (It's a bit on the long side!)

Total cost:  I bought 20 yards of Pimatex years ago, intending it for undies; this used maybe $10's worth. The wavy braid is about 4 years old; I used about 50¢'s worth. 4 buttons maybe 5¢ apiece. (I bought a pound of assorted white china buttons on ebay 10 years ago and have barely made a dent. Let me know if you need some!) Call it $10.70 altogether.


 But what makes this chemise appropriate for the challenge?The text specifies:

As wonderful as making pretty, pretty princess dresses is, the vast majority of people have always been poor commoners, whether they were peasants working the land, servants in big houses, or (later), pioneers carving their own space in new lands. This fortnight let's make something that celebrates the common man.

This chemise isn't a peasant or pioneer garment per se. That is, it would be appropriate for, oh, 75% of the adult female population of the United States.  The fabric is pretty much perfect, the sewing is a mixture of hand and machine, and the buttons and trim are widely available.   That said, it does shade more toward the economic-conscious end of the spectrum instead of the fashion-conscious end. Why?

(1) Style.  This is a very simple style of chemise, with no separate sleeve, a simple band for a yoke, and a simple placket.  It's serviceable and pretty, but nothing fancy.

DSC06418

(2)  Work-saving.  The simplicity of cut and lack of time-intensive styling means it's practical as a home-made garment for a women with a lot of other work to do, or as a style produced for retail.  Many chemises (and chemise patterns in the fashion magazines) have a lot of tucks and hand-done embroidery. Those things take time. I did stroked gathers, but my gathers were large instead of miniscule.

DSC06425

(3) Cheap. The only supplies this chemise takes are fabric, a few buttons, and less than two yards of wavy braid.  A more elaborate chemise could have expensive broderie anglaise applied on it, in a more elaborate style requiring more inches of trim.

DSC06419

(4) Piecing. Did you see one of the places this chemise was pieced? It's actually pieced in two places. One is on the inside of the yoke, but the other is right down the center back.  Piecing is definitely a technique used by thrifty seamstresses throughout history.

DSC06429

The first place I pieced is adding a center back seam instead of cutting it on the fold.  Pimatex is wide enough for one and a half chemise bodies, so I cut out three fronts/backs and two halves. Two of the solid pieces went for my sister-in-law's chemise, so mine is one piece in front and two in back.

The other place I pieced is at the very end of one of the yoke bands.  One of my strips was 5" short,  Instead of cutting a whole new piece, I added on just enough to work, and used that strip as the inside facing.  It doesn't show and doesn't even feel.

DSC06431


So that's it another challenge for the books! And yay for getting my post up earlier!