Showing posts with label accessories. Show all posts

Monday, April 22, 2013

Historical Sew Fortnightly #8: By the Sea: 1860s Hat Veil of Spotted Net


The By the Sea challenge was indeed a challenge for me. I have no immediate use for any period swimwear, alas, and those projects aren't quick ones, either.  Additionally, I'm over 300 miles from the nearest sea; and there are no natural lakes in my entire state!  (Plenty of reservoirs for water, but nothing natural. Well, except for one, and it's on the border with Louisiana.)  In addition, the next challenge, Flora and Fauna, I planned a more ambitious project.  So like the collar for Accessorize, this challenge entrant is also relatively simple: a makeover of an 1860s hat veil.


Several years ago, I ordered a yard of English cotton bobbinette (fine hexagonal mesh) to make a couple of veils for my mother and I.  In Texas the sun's glare is unrelenting, and lasts about 8 months of the year, so it was a good opportunity for my first try at a veil.  I ordered one yard, and cut into half-yard lengths for two veils: 17" deep and about 40" wide.

DSC06889

The theory worked very well: Sun shade! Less squinting!  But the length tended to grab onto the shoulders of my dress.  I finished my mother's with ribbon, which both looked pretty and weighted down the hem.  So when pondering suitable accessories for a By the Sea challenge, I decided to remake my veil.  That meant doing some more serious research on them.

DSC05662
This is what happens when you bundle up a too-long veil to get it out of the way. Bad veil day!

Research

Mid-Victorian veils are hard to research; they are one of those things that everyone knew how and when to use, so they are rarely discussed in fashion magazines or shown in fashion plates.  However, I know they were typical for use when riding or traveling, to protect the face from sun, wind, dust and cinders, as well as for privacy or anonymity.  In many ways, they were to the mid-Victorians what sunglasses are to us today.  In color, black and white were the most common, with occasional mentions of blue, green, and brown.  Looking through a dark-colored mesh is very similar to using sunglasses.

June 1864

Another use for veils was for seaside wear, which is why I chose a veil for the By the Sea challenge.  A good number of summertime fashion plates in the 1850s and after show figures by the sea or lake, in brightly-colored and white ultra-fashionable outfits.  These are the "resort" fashions of 150 years ago.  Like sunglasses, a veil is ideal for these situations, which are are usually bright and breezy.

August, 1865


In museums, I mostly found bonnet veils.  Veils from the 1830s and 1840s are long and nearly square, and often made with big lace patterns.  50s and 60s bonnet veils are smaller, usually wide half-ovals, or occasionally distorted diamond shapes; the straight edge is pinned around the bonnet brim, so the curved edge falls more or less evenly.  These veils are machine-made of net, embroidered with wide lace patterns, borders, and "spots" and/or sprigs. Rectangular veils continued to be worn on bonnets as well, but the round shape was very popular and tended to survive. It's hard to re-purpose something like this:

source

Hats, defined as headwear with a brim all around, first re-appeared in fashion magazines in the 1840s, but remained very much a fringe headwear style until the mid-1860s.  Throughout the 1850s they tended to have large brims and be worn only in the "garden," or perhaps by the seaside.  Although still vastly outnumbered by bonnets, hats with smaller brims appear more commonly in photographs by the early 1860s.  They show up in fashion plates in all seasons and settings.  A handful of written fashion notes talk about both gauze and lace veils.

 August, 1862
But I needed specific information on hat veils, not veils in general.  What does a hat veil look like? Is it different from a bonnet veil?  Here are most of the examples I've found online in the last month or so.

source

Real Women
* Large veil draped on hat; visible only because of wide two-color border. This may be a very big round or half-circle veil pinned only to the front of the hat.
* Sheer veil, turned back over the hat. Looks to be unpatterned, with no visible lace or border, but the definition isn't good. It's not very long.
* Long sheer veil with woven ribbon borders. Looks rectangular, of a crisp fabric, gathered to the front of the hat and laid over the trim.
* Sheer, light-colored, all around the hat. May be either white or blue, because blue photographs light or white with period techniques. Appears to be about chin length; no pattern visible, but the quality of the scan is very low.
* Lace/net veil, at least halfway around the hat. About chin length, and attached at the base of the crown.
* Actual wartime photo, taken in camp. Looks dark, soft, and plain. The length is obscured, but it's hanging as if it does have some length; probably more than chin-length.
* All-over lace veil, shorter than the chin, all around the hat. Fixed to the hat over the front trim. Source from Germany.
* Lower right-hand corner: Long, sheer, with wide ribbon/woven border. 
* Long spotted veil with lace border. Probably worn over the front decoration.
* Long sheer veil, light-colored, with deep hem. Sheer, unpatterned, slightly shiny material.

source

Fashion Plates
* 1859, April. For riding. Green, plain woven, long.
* 1862, August. Black lace, just short of the chin; all around.
* 1863, January.  Long and white; plain woven.
* 1863, July. Black lace, about nose length. All around.
* 1863, September. For riding. Brown, plain woven, long.
* 1863, October. For traveling. Chin length, spotted veil with edging, semi-circle attached to front half of brim, possibly gathered at outside edge.
* 1864, June. Chin length, spotted veil with edging (lace or beads), all around.
* 1864, June. Long and rectangular, spotted with gold edging. Only in front.
* 1864, September. Black spotted net with what looks like beaded fringe. Short and shaped; front and sides only.
* 1865, July.  Long and white; spotted.
* 1865, August. For the seaside. Long and white, plain woven.
* 1865, August. Long and white; plain woven. Attached at the front.

source


A borderline "veil" that appeared in the 1850s (I didn't go further back than 1857) is a fringe of lace, usually black, running all around the brim of the hat. It is usually about 2" long, and I would consider it more a hat trim instead of a separate veil. It does not look easily removable as with regular veils. Most of the plates showing it are from the mid/late 1850s, but I still have two from 1862 and one from 1864. Nonetheless, I haven't found any actual photographs showing this type of veil or trim.

source


This isn't a large sample for research, so I'm leery of drawing any hard conclusions. Still, these seem to be the general types of hat veils:

*  Specialty: Riding (long and sheer, probably plain woven) or traveling (only one picture, but otherwise widely recommended in text, without much elaboration).
* All-over lace: Short to medium length, no longer than the chin.
* Spotted and/or edged: Medium length to long. Probably from the same net that lace is worked on.
* Plain: Long and square. Plain short hem, a deep hem, or with woven/applied ribbons at hem. Probably the ones called "gauze" in fashion magazines.

Original bonnet veil, collection of Pam Robles. Source

Verdict:  I didn't find evidence of a long, plain net veil. I found various medium-length and short net veils, and one long one, but they were all "spotted" with woven dots, sprigs, or rings, and edged with a woven-in or embroidered pattern, or with beaded or gilt fringe (from fashion magazines).

Obviously I don't have a machine for creating specially-made 1860s hat veils. :) So the next best solution was to create my own edging, or apply another one already made, and embroider my own dots. Fun!


The Challenge:  HSF #8, By the Sea

Fabric:  Black English cotton bobbinette from tutu.com

Pattern:  None. I looked at museum sites and pictures, and draped on my hat.

Year:  c. 1860-1864

Notions:  Black alençon lace, unknown content, probably synthetic. Lightweight black thread. Narrow black silk ribbon.

How historically accurate is it?  0% in one way of looking at it, because it's a hand-made approximation of something that was not made by hand.  But overall, maybe 75%, losing major points because of the lace. It also needs a lot more spots!

Hours to complete:  6.

First worn:  Just for some silly pictures, and briefly on the back porch to see how it behaves in a strong breeze. (Just fine!) I hope to take some real pictures once the Flora & Fauna challenge is done, however.

Total cost:  $7 for the lace, of which I used about $1/worth, and about $2.50 for the thread. This was a remake, though, and originally the bobbinette cost over $30/yd; now it's $40. I could get four veils this size out of a yard. So call it $12 for materials. If I started over, the cost for one would be close to $50. I could make 4 out of that amount, however.


Construction

I pinned up the veil on my hat to an approximate chin length, and double-checked to make sure it didn't feel silly. Well, super silly.

DSC06890

The pattern of spots took a little thinking. Most originals have a fairly tight pattern, but it would take a long time to embroider that much. Since I really want to get the Flora and Fauna challenge done on time, I just couldn't justify spending a lot of time on the veil. So I settled for a very wide apart pattern of plain dots, in a diamond pattern about 3" apart.  This pattern I can fill in at a future time, at 1.5", 1", or even .5" intervals. That would be very pretty.

DSC06892

Bobbinette is not nearly as slithery as some sheer fabrics, but it does stretch. Furthermore, it shrugs off chalk markings like nobody's business. The only way I could mark the spots was to put in pins and work directly on my cutting table.

DSC06895


The dots weren't very visible on the grid, but they show up better with white behind them. I kept them small, because I plan to add a lot more.

DSC06893


Eventually my back and neck sent urgent warnings, so I rearranged my work station. No more bending over! The dots were tedious, especially since I did have to keep within a pattern of the mesh, but they still went very fast individually.  When finished, I attached the lace, overlapping the net just slightly. It was unexpectedly tricky to attach the lace, because the net stretches and the lace doesn't.

DSC06894

I left the original sewn casing and ribbon. In the future I might tat, crochet, or net a fine row of beading to run the ribbon through, similar to original veils.

DSC06896

In these pictures I carefully pinned the veil to the edge of the brim, but I don't think I'll bother with that when I wear it. It's surprisingly difficult to do, and doesn't seem to be as common a way to attach the veil to a hat.


DSC06903


DSC06902

I like the effect when it's pulled back over the hat. A kind of graceful disorder. ;)

DSC06906

In this one, I tried putting it on just the front/sides of the brim.  In some ways it doesn't look different, and in others it looks silly. I think this method of attachment is best for one of the long veils.


Monday, April 15, 2013

Historical Sew Fortnightly #7: Accessorize: 1860s Embroidered & Edged Collar


I had big plans for this challenge. I've done 1860s reenacting for quite some a very long time, but my wardrobe is a bit scattered in completeness and accuracy. Take personal linens. I have a couple of chemisettes (one of which had a supporting role in The Paisley Pixie), one set of very plain undersleeves, a couple of plain collars, and one nicer collar that is in dire need of Oxy-Clean.

HSF #7, Accessorize, sounded like a great opportunity to fill in some gaps.  I decided I needed fancy undersleeves. 1860s undersleeves can be works of art, all fluffy, frilly, lacey, ribbon-y goodness. The problem was deciding exactly what design to make up or copy.

The HSF challenge has been very good for me in several ways. One way is how it forces me to make a decision and get moving.  When I don't have a close deadline, I will take a long time on deciding exactly what to make, and take lots of breaks during construction to research certain elements. (Like the issue I had with the pleat pattern on the back of the red wool dress.)  But when a countdown clock is ticking, whether for an event or a challenge, I'm forced to research quickly and efficiently.  In this case, however, costuming the early 1860s is where I have my personal* highest standards.  So not only are there literally thousands of inspiration images to choose from, I was more hyper than usual about choice of materials.

* Personal: Meaning these are my own standards for what I do, not for how I judge anyone else's work.

All that to say: I didn't start researching this until the first few days of the challenge. Once I found an image, I studied it a lot, asked for advice, studied more, played with my stash, and eventually had the world's ugliest mock-up and a decent pattern. By day 8.  Out of the remaining 6 days, 3 would be away from home and 1 was otherwise fully occupied.  I worked hard even on my trip, but I knew they wouldn't get done without an all-nighter. And that was not the point of the challenge.

So I didn't finish my undersleeves! But day 14, I came up with an alternativee plan that was way easier, fits both the challenge and another wardrobe gap, and goes with the undersleeves perfectly. A collar from the same fabric:

DSC06822

The Challenge:  HSF #7, Accessorize

Fabric:  Machine-embroidered sheer cotton, vintage curtains, from the Benbrook Antique Mall

Pattern:  Laughing Moon #111

Year:  c. 1860-1864

Notions:  Narrow cotton machine-made valenciennes lace; probably from an antique mall somewhere in Texas. 1/4" cotton "galon" twill tape from India; extra lightweight/thin, from ebay, the last the seller had.

How historically accurate is it?  As close to 100% as I can get without documenting lace or machine-made embroidery patterns. Bias tape was more common than twill tape in these collars, but it was used. Oh, and I used poly thread, because it's the only fine thread I have. Say 95%.

Hours to complete:  No more than 3.

First worn:  Not yet. Probably at Gettysburg in late June.

Total cost:  None, or pennies at most. The collar fabric was scraps from the undersleeves, and the lace and tape were bought for the stash.


With very few exceptions, no mid-19th-century dress was complete without a collar. In most cases they were finished with a bias or twill tape that was basted to the inside of the dress neckline, thus protecting the edge of the dress from oil and dirt.  Sometimes they were plain, but often they were of very fine fabrics, which could be embroidered and/or edged with lace, or completely of lace.  By the early 1860s they were also fairly narrow, 1 - 1.5" wide.  The width of a collar is an easy way to date an image, by the way; 15-20 years earlier, collars could be 3 - 4" wide.


With a basic bodice pattern, no separate collar pattern is usually needed. Except that I've had wretched luck with collars in the past, always ending up with them too short, or too long, or with the ends wonky, and always crooked when I baste them on.  My one success has come with the Laughing Moon pattern, which was recommended by a lady who had a business making beautiful and accurate 1860s clothing.  So I had no hesitation in pulling out this pattern and going for it.


Laying out the pattern was one of the trickiest parts. Like most sheers, the cotton was wiggly. And the embroidery was not done consistently with the grain. (Look at the first picture. See four dots on the left, and three on the right? I didn't even see that until I was nearly finished.)  Once I found a fairly pleasing position for the motifs, I pinned the pattern down. But instead of cutting, I traced around it.

DSC06812

It's easy to distort sheer fabrics when stitching on them. So I took a cue from 18th century embroidery techniques, and applied my embellishment before cutting out.

DSC06813

With fine thread, I sewed the lace down flat, just covering the cutting line.

DSC06815

I did the same with the galloon tape, sewing one edge to the collar about 1/4" (the seam allowance) away from the cutting edge.

DSC06816

I hope you can see how thin the tape is.

DSC06817

The tape stands up because it's a straight strip, being forced to fit a curve. This should allow it to fold under the neckline of the dress.

DSC06818

Then I carefully cut the collar out, roughly 1/8" from the stitching line of the tape...

DSC06819

... and underneath the lace.

DSC06820

Finished collar!

DSC06821

There are raw edges, but this type of collar is not intended to be washed roughly.  Before taking the pictures I hit it with spray starch and an iron.


More to come on the Saga of the Undersleeves! They may make an appearance as a later challenge.

Tuesday, March 26, 2013

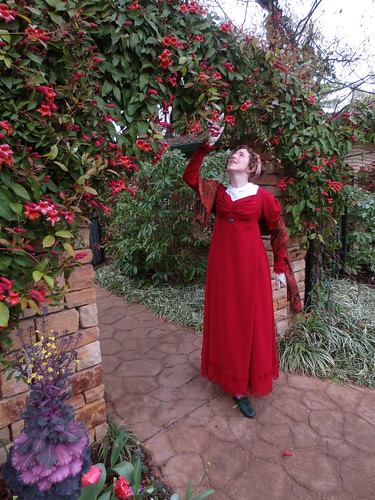
The Paisley Pixie: Wings 'n' More

I started to make this one post with the Picnic, but there's just too much to combine. So I'll be doing some separate post on the construction of the Paisley Pixie.  And also so this blog doesn't look so ME ME ME ME as the last post did!

IMG_0872

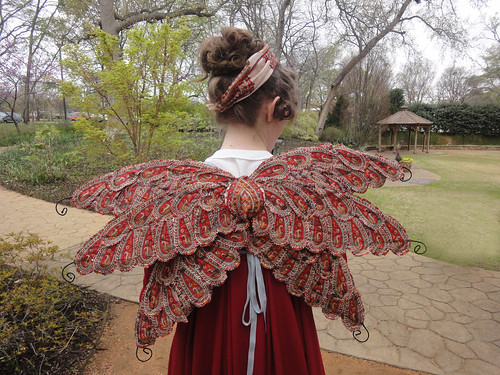
The Wings

 Back in my first post on the Paisley Pixie, I showed the vintage sari that I was going to use to create wings. Last week I finally took pinking shears to it and cut out over 140 large botehs, or paisley motifs.

Vintage Silk Sari 1

DSC06479

I took the glittery fairy wings out of their package, spread waxed paper all over my cutting table, swiped a can of spray adhesive from my parents (with permission), and got to work.  Or tried to.

DSC06483

I made a foundation layer for the wings from the main part of the sari. I wasn't sure how completely the paisley feathers would cover.

DSC06486

I've never used spray adhesive before; eventually I figured out it wasn't strong enough to hold everything on, even with tissue-thin silk. It stayed sticky, and the fabric started sticking to the wax paper instead of to the wings.  I tried putting some of the first paisleys on with adhesive, saturating them to get enough glue.  Instead they just turned dark, with a sticky layer of visible glue on the surface of the fabric.

DSC06490

Real fabric glue was the next step.  I grabbed the first thing I found at Joann's and tried again. It worked much better, although it was very thick and stringy, like hot glue, and I quickly ran out. I did most of the front of the wings with it, though, and was encouraged.

Next time I got a different kind of glue. It was more liquid and much easier to use.  Unfortunately, it also soaked through and darkened the silk, permanently. I didn't discover this until the back side of the wings - the side totally unblocked by my body when worn - had been finished.  After giving up for a few days, I used extra paisleys and carefully layered them over the darkest and most obvious blotches. That was as good as I could get it.

DSC06981

The wings, as originally designed, stayed in position between my shoulder blades with some elastic loops. The glue and silk, although super light, added enough weight that the finished wings sagged. So I pinned some gray twill tape to the center back and used it to tie the wings into place.

DSC06963


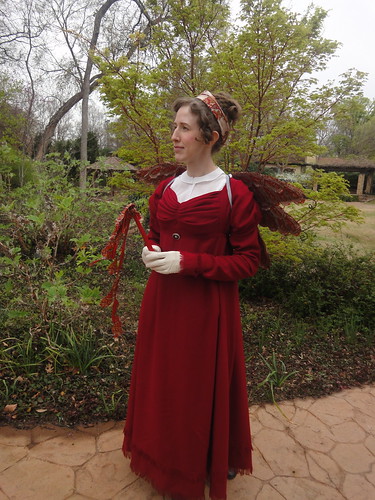
The Accessories

I don't think I got any pictures with the fringed reticule. It was used, though, and very glad I was to have it.

The wand is a medium-sized loom bobbin. I found it at the Antique Elegance show in February for $6. I tied on some streamers of scrap from cutting out the bobbins and went with it.  I figured a bobbin was appropriate for a Paisley Pixie!

DSC06544

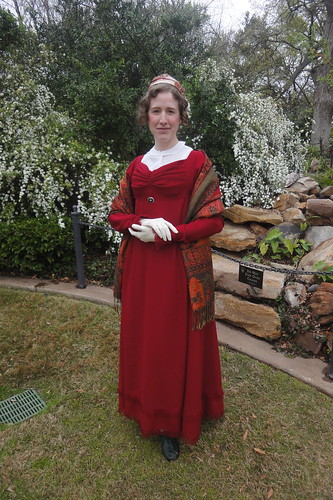
The chemisette is one I made for 1860s several years ago, with a plain narrow collar.  It's not so typical a style for the 1800s-1810s, but it's perfectly plausible. And it was far better than nothing. I have plans for different types of chemisettes, ruffs, and even a "habit shirt" for this dress eventually.

I wore green Robert Land shoes. These are appropriate for the 1810s, although the latchet style seems like a throwback to the 1770s and 1780s. But the flat profile and rounded toe is a transition, from the pointy-toed heels of the 1790s and pointy-toed flats of the 1800s to the square toes of the 1830s.


The shawl I picked up at a Civil War reenactment several years ago; I honestly don't remember where. It's not really big enough for either the 1860s or for Regency, but the pattern is wonderful. If I ever find the source again, I want to get two and seam them together for the perfect Regency shawl.

And finally, gloves. These are a total cheat: 1950s nylon!  But they are finished and embossed to look like kid leather. Real kid leather gloves get brown spots when they get wet, so I was not going to use my nice leather gloves on a picnic. Sorry, world!  I'm meditating a search for mustard yellow leather gloves, though. Yellow was a popular color for gloves and shoes. Wouldn't that be nice with the red?

DSC07008

Friday, March 22, 2013

Historical Sew Fortnightly #6: Stripes: Fringed Reticule


I desperately needed a reticule to go with the red wool dress from the Embellish challenge. I had some fabric left, and a good length of self-made fringe. So I was off!

DSC06466

I've been planning to make some reticules for a while, collecting images on a Pinterest board. So when it was time to make this bag, researching was fast! The majority of surviving bags tend to be silk, in light colors, and embroidered or painted. Neither one of those options was going to work for this bag. There were a few dark colored ones I found, mostly in velvet; and one of those did not have any trim at all, although it had some big tassels.


I also quickly decided I wanted a bag that was 3-D, instead of flat or gathered all around. I was particularly drawn to bags with angles and straight edges instead of curves.


This was my favorite. It's been folded very flat, but it does appear to be three-sided instead of two. (Hurrah for multiple pictures at the Met!)  If it is three sides, it should be assembled just like the purple silk bag.  There are only three pieces, each a tall hexagon. The long sides are sewn to each other, then the bottom points are sewn together to make a bag.  The top points on the velvet bag are left free to stick up, because the drawstring channel is run across from corner to corner.


I made my best guess on the proportions from dimensions at the Met and MFA for similar bags. I deliberately erred on the "too wide" side because I want this bag to be functional.  Tiny, ornate little jugs or pineapples are adorable, but I really needed a bag I could carry keys, a phone, and a camera in.  Besides, when I do make a tiny reticule, I want it to be something awesome and beaded or netted or embroidered within an inch of its life!


To fit the Stripes challenge, I thought it would be fun to do the same thing with fringe on the bag that I did on the skirt.  I had exactly enough fringe to go twice around the bag.  I cut the bag pieces long enough to do the inverse tuck I did for setting the upper row on my skirt.  This time I took better pictures. It's a much smaller project, so it's easier to document what I did. Although the red turned out very reflective with the flash, so maybe these won't be helpful at all.

To start, I sewed the pieces together into a strip. This would be incredibly difficult to do in the round.
DSC06446
Pressing lines for the two tucks.

DSC06448
It's hard to see, but this is with the first fold pressed. Wrong sides are together, with the shorter side on top.

DSC06450
Pressing the second fold of the tuck, on the wrong side. It's about 5/8" deep; tricky to get precise with this wool.

DSC06451
One tuck done.

DSC06452
Detail view, from the right side.

DSC06453
Both tucks done, ready to insert the fringe.

DSC06454
First row of fringe sewn in, and the second row half sewn and half pinned. This was easy to do from the right side.

DSC06455
Reverse side, showing the tucks pointing upward.

Then I prepped the lining.  Since I wanted standing points, those had to be faced; but I wasn't excited about having more wool on the inside of the bag. So I cut facings for just the points, and sewed them to a linen lining.

DSC06456

DSC06457
All visible sewing is by hand.

I also did two eyelets on the inside, for the drawstring casing.

Figuring out how to assemble this was tricky. My goal was to be able to sew everything together, turn it, and have one inside lining seam to do from the outside. I thought it all through several times, then pin basted the entire thing just to make sure. Then I took notes so I wouldn't forget how I did it. The drawstring casing was done last, by hand, when it was entirely assembled.

DSC06458 edited

DSC06459

DSC06460

DSC06464

DSC06469

Someday I will replace the ribbon ties with silk cord, and probably tassels as well. Lots of tassels!


The Challenge:  HSF #6, Stripes

Fabric:  Dark red wool tricotine from FFC

Pattern:  Self-drafted from museum pictures and dimensions.

Year:  1800-1820, roughly.

Notions:  1/8" black silk ribbon for the drawstrings. Self-fabric fringe.

How historically accurate is it?  Oh... 60%? I can't exactly document the fabric or fringe on a reticule, but I have a very small number of examples to make generalizations from.  I did machine sew pretty much all construction seams. This bag had to happen in one day or it wouldn't have happened at all. I wish I'd had the time to do it by hand! But the shape and construction is accurate.

Hours to complete:  About 7; I did it last Friday. I got started in the early afternoon and finished in the middle of the evening.

First worn:  This coming Saturday.

Total cost:  None, because this was a bonus project by my standards. The fringe was left over, as was the wool. The ribbon is just stock on hand.


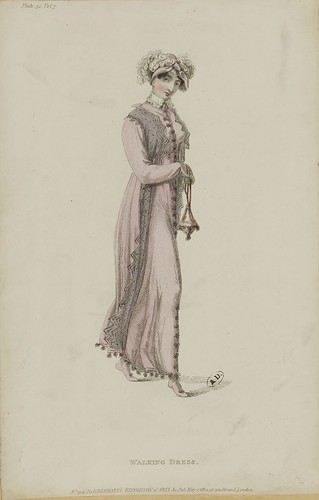
I did  wonder briefly if perhaps matching the reticule to the dress is a no-no, as it is in other decades.  As far as white cotton or silk goes, I think it's fine; extant dresses and reticules in white are plentiful.  As for colored reticules, a quick survey of fashion plates showed three categories: Reticule matching part of the evening dress, reticule matching spencer or other wrap (and often other accessories), and reticule matching a "walking dress." 

M5053MA_214X02X00034_L_3

My red gown isn't a walking dress, so this isn't the best documentation.   But it's hard to prove or disprove a negative, so I'll just keep an eye out for different examples.  For what it's worth, the many fashion plates of wool gowns don't show any reticules.  And there are always more reticules in my plans.