
I desperately needed a reticule to go with the red wool dress from the Embellish challenge. I had some fabric left, and a good length of self-made fringe. So I was off!

I've been planning to make some reticules for a while, collecting images on a Pinterest board. So when it was time to make this bag, researching was fast! The majority of surviving bags tend to be silk, in light colors, and embroidered or painted. Neither one of those options was going to work for this bag. There were a few dark colored ones I found, mostly in velvet; and one of those did not have any trim at all, although it had some big tassels.

I also quickly decided I wanted a bag that was 3-D, instead of flat or gathered all around. I was particularly drawn to bags with angles and straight edges instead of curves.


This was my favorite. It's been folded very flat, but it does appear to be three-sided instead of two. (Hurrah for multiple pictures at the Met!) If it is three sides, it should be assembled just like the purple silk bag. There are only three pieces, each a tall hexagon. The long sides are sewn to each other, then the bottom points are sewn together to make a bag. The top points on the velvet bag are left free to stick up, because the drawstring channel is run across from corner to corner.

I made my best guess on the proportions from dimensions at the Met and MFA for similar bags. I deliberately erred on the "too wide" side because I want this bag to be functional. Tiny, ornate little jugs or pineapples are adorable, but I really needed a bag I could carry keys, a phone, and a camera in. Besides, when I do make a tiny reticule, I want it to be something awesome and beaded or netted or embroidered within an inch of its life!
To fit the Stripes challenge, I thought it would be fun to do the same thing with fringe on the bag that I did on the skirt. I had exactly enough fringe to go twice around the bag. I cut the bag pieces long enough to do the inverse tuck I did for setting the upper row on my skirt. This time I took better pictures. It's a much smaller project, so it's easier to document what I did. Although the red turned out very reflective with the flash, so maybe these won't be helpful at all.
To start, I sewed the pieces together into a strip. This would be incredibly difficult to do in the round.
 |
| Pressing lines for the two tucks. |
 |
| It's hard to see, but this is with the first fold pressed. Wrong sides are together, with the shorter side on top. |
 |
| Pressing the second fold of the tuck, on the wrong side. It's about 5/8" deep; tricky to get precise with this wool. |
 |
| One tuck done. |
 |
| Detail view, from the right side. |
 |
| Both tucks done, ready to insert the fringe. |
 |
| First row of fringe sewn in, and the second row half sewn and half pinned. This was easy to do from the right side. |
 |
| Reverse side, showing the tucks pointing upward. |
Then I prepped the lining. Since I wanted standing points, those had to be faced; but I wasn't excited about having more wool on the inside of the bag. So I cut facings for just the points, and sewed them to a linen lining.

 |
| All visible sewing is by hand. |
I also did two eyelets on the inside, for the drawstring casing.
Figuring out how to assemble this was tricky. My goal was to be able to sew everything together, turn it, and have one inside lining seam to do from the outside. I thought it all through several times, then pin basted the entire thing just to make sure. Then I took notes so I wouldn't forget how I did it. The drawstring casing was done last, by hand, when it was entirely assembled.


Someday I will replace the ribbon ties with silk cord, and probably tassels as well. Lots of tassels!
The Challenge: HSF #6, Stripes
Fabric: Dark red wool tricotine from FFC
Pattern: Self-drafted from museum pictures and dimensions.
Year: 1800-1820, roughly.
Notions: 1/8" black silk ribbon for the drawstrings. Self-fabric fringe.
How historically accurate is it? Oh... 60%? I can't exactly document the fabric or fringe on a reticule, but I have a very small number of examples to make generalizations from. I did machine sew pretty much all construction seams. This bag had to happen in one day or it wouldn't have happened at all. I wish I'd had the time to do it by hand! But the shape and construction is accurate.
Hours to complete: About 7; I did it last Friday. I got started in the early afternoon and finished in the middle of the evening.
First worn: This coming Saturday.
Total cost: None, because this was a bonus project by my standards. The fringe was left over, as was the wool. The ribbon is just stock on hand.
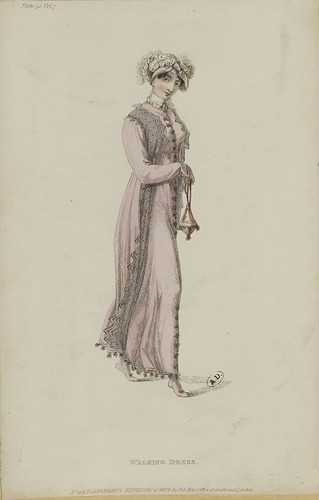
I did wonder briefly if perhaps matching the reticule to the dress is a no-no, as it is in other decades. As far as white cotton or silk goes, I think it's fine; extant dresses and reticules in white are plentiful. As for colored reticules, a quick survey of fashion plates showed three categories: Reticule matching part of the evening dress, reticule matching spencer or other wrap (and often other accessories), and reticule matching a "walking dress."
My red gown isn't a walking dress, so this isn't the best documentation. But it's hard to prove or disprove a negative, so I'll just keep an eye out for different examples. For what it's worth, the many fashion plates of wool gowns don't show any reticules. And there are always more reticules in my plans.
Love your stripes interpretation!
ReplyDeleteNeeds must! :D But seriously, I liked it a lot myself. I think it ended up a cute bag, without spending a huge amount of time in beading or embroidery.
Delete