Showing posts with label tutorial. Show all posts

Tuesday, March 26, 2013

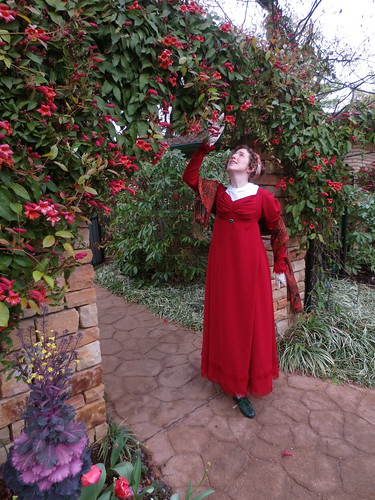
The Paisley Pixie: Wings 'n' More

I started to make this one post with the Picnic, but there's just too much to combine. So I'll be doing some separate post on the construction of the Paisley Pixie.  And also so this blog doesn't look so ME ME ME ME as the last post did!

IMG_0872

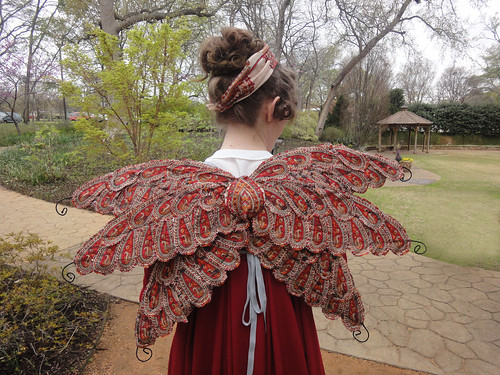
The Wings

 Back in my first post on the Paisley Pixie, I showed the vintage sari that I was going to use to create wings. Last week I finally took pinking shears to it and cut out over 140 large botehs, or paisley motifs.

Vintage Silk Sari 1

DSC06479

I took the glittery fairy wings out of their package, spread waxed paper all over my cutting table, swiped a can of spray adhesive from my parents (with permission), and got to work.  Or tried to.

DSC06483

I made a foundation layer for the wings from the main part of the sari. I wasn't sure how completely the paisley feathers would cover.

DSC06486

I've never used spray adhesive before; eventually I figured out it wasn't strong enough to hold everything on, even with tissue-thin silk. It stayed sticky, and the fabric started sticking to the wax paper instead of to the wings.  I tried putting some of the first paisleys on with adhesive, saturating them to get enough glue.  Instead they just turned dark, with a sticky layer of visible glue on the surface of the fabric.

DSC06490

Real fabric glue was the next step.  I grabbed the first thing I found at Joann's and tried again. It worked much better, although it was very thick and stringy, like hot glue, and I quickly ran out. I did most of the front of the wings with it, though, and was encouraged.

Next time I got a different kind of glue. It was more liquid and much easier to use.  Unfortunately, it also soaked through and darkened the silk, permanently. I didn't discover this until the back side of the wings - the side totally unblocked by my body when worn - had been finished.  After giving up for a few days, I used extra paisleys and carefully layered them over the darkest and most obvious blotches. That was as good as I could get it.

DSC06981

The wings, as originally designed, stayed in position between my shoulder blades with some elastic loops. The glue and silk, although super light, added enough weight that the finished wings sagged. So I pinned some gray twill tape to the center back and used it to tie the wings into place.

DSC06963


The Accessories

I don't think I got any pictures with the fringed reticule. It was used, though, and very glad I was to have it.

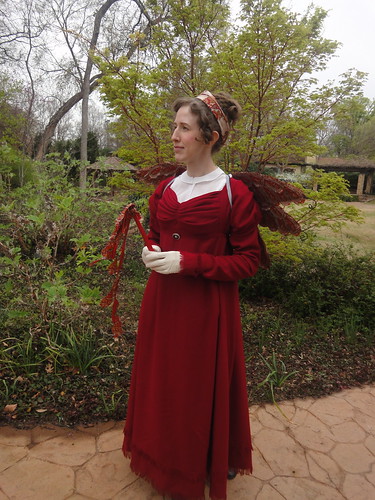
The wand is a medium-sized loom bobbin. I found it at the Antique Elegance show in February for $6. I tied on some streamers of scrap from cutting out the bobbins and went with it.  I figured a bobbin was appropriate for a Paisley Pixie!

DSC06544

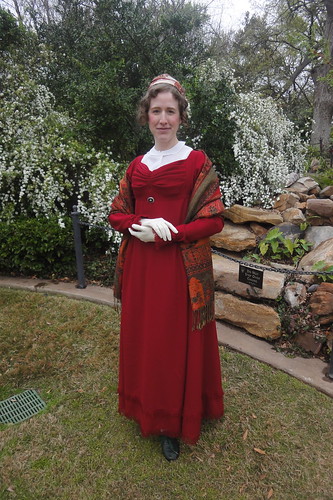
The chemisette is one I made for 1860s several years ago, with a plain narrow collar.  It's not so typical a style for the 1800s-1810s, but it's perfectly plausible. And it was far better than nothing. I have plans for different types of chemisettes, ruffs, and even a "habit shirt" for this dress eventually.

I wore green Robert Land shoes. These are appropriate for the 1810s, although the latchet style seems like a throwback to the 1770s and 1780s. But the flat profile and rounded toe is a transition, from the pointy-toed heels of the 1790s and pointy-toed flats of the 1800s to the square toes of the 1830s.


The shawl I picked up at a Civil War reenactment several years ago; I honestly don't remember where. It's not really big enough for either the 1860s or for Regency, but the pattern is wonderful. If I ever find the source again, I want to get two and seam them together for the perfect Regency shawl.

And finally, gloves. These are a total cheat: 1950s nylon!  But they are finished and embossed to look like kid leather. Real kid leather gloves get brown spots when they get wet, so I was not going to use my nice leather gloves on a picnic. Sorry, world!  I'm meditating a search for mustard yellow leather gloves, though. Yellow was a popular color for gloves and shoes. Wouldn't that be nice with the red?

DSC07008

Friday, March 22, 2013

Historical Sew Fortnightly #6: Stripes: Fringed Reticule


I desperately needed a reticule to go with the red wool dress from the Embellish challenge. I had some fabric left, and a good length of self-made fringe. So I was off!

DSC06466

I've been planning to make some reticules for a while, collecting images on a Pinterest board. So when it was time to make this bag, researching was fast! The majority of surviving bags tend to be silk, in light colors, and embroidered or painted. Neither one of those options was going to work for this bag. There were a few dark colored ones I found, mostly in velvet; and one of those did not have any trim at all, although it had some big tassels.


I also quickly decided I wanted a bag that was 3-D, instead of flat or gathered all around. I was particularly drawn to bags with angles and straight edges instead of curves.


This was my favorite. It's been folded very flat, but it does appear to be three-sided instead of two. (Hurrah for multiple pictures at the Met!)  If it is three sides, it should be assembled just like the purple silk bag.  There are only three pieces, each a tall hexagon. The long sides are sewn to each other, then the bottom points are sewn together to make a bag.  The top points on the velvet bag are left free to stick up, because the drawstring channel is run across from corner to corner.


I made my best guess on the proportions from dimensions at the Met and MFA for similar bags. I deliberately erred on the "too wide" side because I want this bag to be functional.  Tiny, ornate little jugs or pineapples are adorable, but I really needed a bag I could carry keys, a phone, and a camera in.  Besides, when I do make a tiny reticule, I want it to be something awesome and beaded or netted or embroidered within an inch of its life!


To fit the Stripes challenge, I thought it would be fun to do the same thing with fringe on the bag that I did on the skirt.  I had exactly enough fringe to go twice around the bag.  I cut the bag pieces long enough to do the inverse tuck I did for setting the upper row on my skirt.  This time I took better pictures. It's a much smaller project, so it's easier to document what I did. Although the red turned out very reflective with the flash, so maybe these won't be helpful at all.

To start, I sewed the pieces together into a strip. This would be incredibly difficult to do in the round.
DSC06446
Pressing lines for the two tucks.

DSC06448
It's hard to see, but this is with the first fold pressed. Wrong sides are together, with the shorter side on top.

DSC06450
Pressing the second fold of the tuck, on the wrong side. It's about 5/8" deep; tricky to get precise with this wool.

DSC06451
One tuck done.

DSC06452
Detail view, from the right side.

DSC06453
Both tucks done, ready to insert the fringe.

DSC06454
First row of fringe sewn in, and the second row half sewn and half pinned. This was easy to do from the right side.

DSC06455
Reverse side, showing the tucks pointing upward.

Then I prepped the lining.  Since I wanted standing points, those had to be faced; but I wasn't excited about having more wool on the inside of the bag. So I cut facings for just the points, and sewed them to a linen lining.

DSC06456

DSC06457
All visible sewing is by hand.

I also did two eyelets on the inside, for the drawstring casing.

Figuring out how to assemble this was tricky. My goal was to be able to sew everything together, turn it, and have one inside lining seam to do from the outside. I thought it all through several times, then pin basted the entire thing just to make sure. Then I took notes so I wouldn't forget how I did it. The drawstring casing was done last, by hand, when it was entirely assembled.

DSC06458 edited

DSC06459

DSC06460

DSC06464

DSC06469

Someday I will replace the ribbon ties with silk cord, and probably tassels as well. Lots of tassels!


The Challenge:  HSF #6, Stripes

Fabric:  Dark red wool tricotine from FFC

Pattern:  Self-drafted from museum pictures and dimensions.

Year:  1800-1820, roughly.

Notions:  1/8" black silk ribbon for the drawstrings. Self-fabric fringe.

How historically accurate is it?  Oh... 60%? I can't exactly document the fabric or fringe on a reticule, but I have a very small number of examples to make generalizations from.  I did machine sew pretty much all construction seams. This bag had to happen in one day or it wouldn't have happened at all. I wish I'd had the time to do it by hand! But the shape and construction is accurate.

Hours to complete:  About 7; I did it last Friday. I got started in the early afternoon and finished in the middle of the evening.

First worn:  This coming Saturday.

Total cost:  None, because this was a bonus project by my standards. The fringe was left over, as was the wool. The ribbon is just stock on hand.


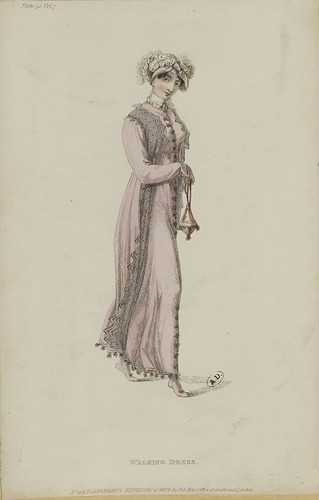
I did  wonder briefly if perhaps matching the reticule to the dress is a no-no, as it is in other decades.  As far as white cotton or silk goes, I think it's fine; extant dresses and reticules in white are plentiful.  As for colored reticules, a quick survey of fashion plates showed three categories: Reticule matching part of the evening dress, reticule matching spencer or other wrap (and often other accessories), and reticule matching a "walking dress." 

M5053MA_214X02X00034_L_3

My red gown isn't a walking dress, so this isn't the best documentation.   But it's hard to prove or disprove a negative, so I'll just keep an eye out for different examples.  For what it's worth, the many fashion plates of wool gowns don't show any reticules.  And there are always more reticules in my plans.

Wednesday, July 18, 2012

Sewing Room, with Bonus Table Tutorial

Yes, I have a whole room for sewing and storing costumes! (And the computer and mailing supplies and vintage to be resold &c...)

Last year I bought a house. Until that time I lived with my parents. All of my sewing supplies and equipment were stored in my little bedroom. I had two under-bed boxes of fabric, three stacking bins in the closet, one medium dresser drawer of tools and supplies, multiple boxes of patterns and trims in the closet, and the knee-hole under my desk was usually full of sewing boxes, current projects, and things that couldn't possibly fit anywhere else. I had another bag of fabric in the attic, along with some wool batting. My sewing machine lived on a shelf in the closet.

In order to sew, I set up a decades-old card table in the middle of my floor, next to my bed. I sat on my vanity stool to use the machine. The ironing board was on the other side of the table. I couldn't get the under-bed boxes out with the table set up. Cutting out involved a cardboard cutting mat on the floor (again, no table) or occasionally on my bed. Did you know a cardboard cutting mat is the exact size of a twin mattress? You'll thank me later.

Going from one small bedroom to an entire house is of course fantastic. Part of what made my house The One, though, was its bonus room: A loft under the peak of the roof. It is not open to the rest of the house, but the stairs enter directly with no door. It has no bathroom, but a huge closet. And one big window (directly opposite the neighbors' house, the only drawback). Perfect sewing room!

I spent a lot of time looking for sewing room inspiration. With no furniture to speak of, I had a very blank slate to start with. Here's what I had before New Year's.


The white farm table was $85 at an antique mall, and it just about killed me to get it upstairs. The legs screwed off easily, but the table top itself is incredibly heavy. It must be solid oak. I had to roll it on its corners from the vehicle to the front door, slide it across the carpet, and tug it with frantic strength up the stairs. It's wonderful, though. The white paint is heavy and smooth, with enough existing nicks that I don't feel bad for using it. It's heavy enough that it doesn't shake or move when I shove it or the machine gets going fast.


The lamp is an old "ginger jar" (my name!) from my parents' attic. I've since gotten another one, but this one is still in use on the computer table.

I also love the small bin organizer (from Target), which holds tools and some notions.  One has scissors, one has pins and pincushions and tape measures, one has drafting tools like pattern weights and chalk, one has fasteners like hooks & eyes and snaps...

The thread spool holder will eventually go on the wall. I didn't want to make a bunch of holes yet, though, because I'm still settling in and things can move. As it happened, the table has since moved, so this was a wise choice.

The yellow chair is one of a pair of original Victorian Eastlake chairs I got for a bargain at $75 for the set. Since then, the webbing on the bottom has torn. I still need to replace it. Oops!

I love my mother's wooden ironing board, and hated using the flimsy metal ones owned by college students and hotels. This one could be longer and taller, but I found it, complete with cover, for $15 at another antique mall.
 
 The trunk barely visible on the right I bought at an antique mall (See a trend here?) 4 or 5 years ago. It holds nearly all of my Civil War reenacting gear. Dresses, outerwear, and petticoats hang up elsewhere, and my undies (chemises, drawers, and corsets) are in a smaller chest to be handy for fitting. In my old bedroom, this trunk also held up my computer. I sat on the end of my bed, keyboard on my knees, mouse on the windowsill, and my feet on the small chest. It worked, but I don't miss those days!


And here is my darling, my cutting table. I'm fairly tall at 5'9".  My old sewing layout had lots of disadvantages, but I never knew the misery of cutting on a regular table until I moved into my house. Oh, my back and shoulders! I'd rather cut on the floor for the rest of my days!  This table is counter height, roughly waist high on me.  It's simply a door, covered with oilcloth, and resting on two large-size bin organizers, also from Target like the small one. The organizers are 36" tall exactly, so with the depth of the door, the surface is over 37" from the ground.

The door is slightly too narrow and too long to fit the cardboard mat exactly, but it's very close. After 6 months of constant use, I'm still thrilled to have it. I use it constantly, not just for cutting. All of my pattern draping and tracing, layout, pinning, taking notes, and even ironing - it's my preferred workstation.

Ironing? I don't mind ironing, but huge lengths of fabric can be a real pain. My new board is smaller than the one I'm used to, too. In desperation, I pulled out a wool blanket, which is thick and insulating, and clamped it to the table top with $1 heavy spring clamps from Home Depot. Worked like a charm! I could iron the entire 60" width at once, and as long as my arms could reach. It took 1.5 hours to iron 15 yards, instead of 2 or 3 times as long. Yay!

The cubbies are another idea I'm so glad for. The pink and green fabric bins hold a variety of things, from trims, flowers, lace, and tape, to patterns organized by type and size. One holds all my muslin, from the nice recently-bought lengths to the crazy shapes that are impossible to use but too big to throw away. One cubby holds ironing supplies: spray starch, distilled water, and spray bottle with water. (Way better than just a steam iron!) I've saved the zippered bags that come with bed linens and curtains, and use them for storing on-hold projects, especially those with lots of pieces or notes. And another cubby is the perfect size for a 3-drawer organizer. One drawer holds neat folds of interfacing; another holds all my zippers. I didn't realize I had so many!

The cedar chest was given to me by my grandmother over Thanksgiving. It holds almost all of my fabric, including all of my wool.  The rest is in the bins on the left.

There's plenty more stuff piled out of sight behind the table. This is very much a work in progress. I will post some more recent pictures soon, showing it in all its Costume College-related chaos.


Bonus Table Tutorial

I'm not sure anyone will find this beneficial, but I might as well write up exactly how I made the table.

The top of the table is a door. I got a hollow-core unfinished wooden door in the standard bedroom door size, 80" x 36".  It comes ready sanded and ready to prime, with no door handle hole cut.  Home Depot, under $30.

To cover it, I bought 2.5 yards of oilcloth (flannel-backed vinyl) from Joann.  I think the cover is somewhat optional; the door had no snags or sharp corners that I could find. I wanted something with a smooth surface and no dyes to rub off.

Then center the door on the oilcloth and get to work with a staple gun!


I folded and stapled each corner in several steps to get it reasonably smooth.


Don't pull it too tight. You don't want it loose enough to wrinkle or pull, but oilcloth isn't meant to be under a strain.


Then put it on top of your organizers, or matching low bookcases, or packing crates, or sawhorses, or whatever works for you.  Done!

I was planning on having the table top fastened to the top of the shelving units, but my father talked me out of it.  The door and the organizers are plenty sturdy; I've not yet had it rock or tilt. I've shoved the top over slightly when leaning on it, but that's all. And having them bolted together would make it extremely difficult to move or adjust. Sometimes I want it a little closer or further from the wall, and moving the organizers is a lot harder than just sliding the table a few inches.  I did move the whole sewing room around a few months ago as well. I was very glad then they weren't in one piece!


Whatever your current sewing setup, whether it's an entire room or a desk in the corner of your bedroom (or a card table in the middle of the floor), what is your favorite part of it? In my old one, I liked how I could get on either side of the ironing board.  Now, it's my tall table. What's yours?